Category Archives: Sewing

Infant Elvis Costume NO SEW!

Standard

elvis 12

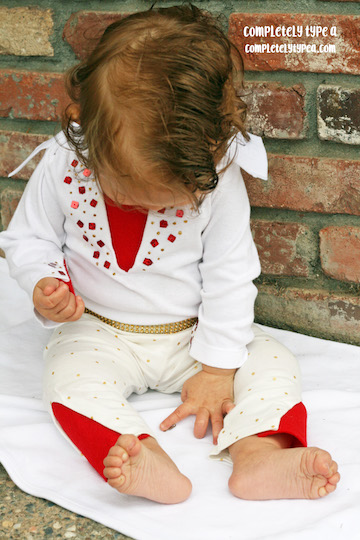
That’s right, you read correctly, this is a NO SEW Elvis costume.  I used my hot glue gun to put it together.  It was a late night, last minute, one hour project, using my cell phone to take pictures… So you get what you get.

Now, if you’re looking for a durable costume to last you for years to come, for heaven sake, pull out the sewing machine and sew wherever I say glue.  BUT, if you know your kid is only going to wear this once or twice, and you don’t care if it lasts that long, follow my lead, my friends.

I started out with a long-sleeve onesie and a pair of white leggings from Target.  I went looking for plain white, but the only ones I could find had little gold dots on them.  Luckily, this worked with the costume.  You’ll also need red felt, stiff white felt, red and gold glitter glue, gold elastic, Velcro dots, sequin, and most important, a glue gun.

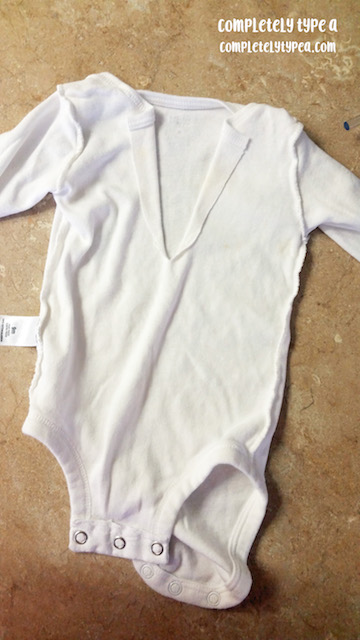
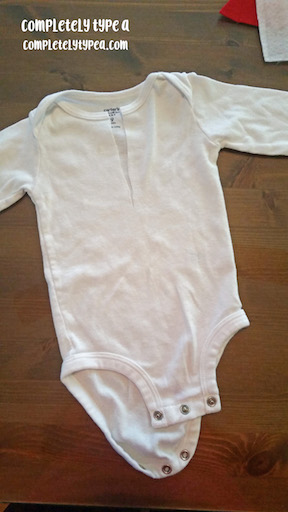
Step 1: Cut a slit in the front of the onesie starting at the middle of the collar.  Turn the onesie inside out and fold the side back and glue down with hot glue.  Be careful that your glue doesn’t go through both layers.  Place cardboard in between to be safe.
elvis 1

elvis 2

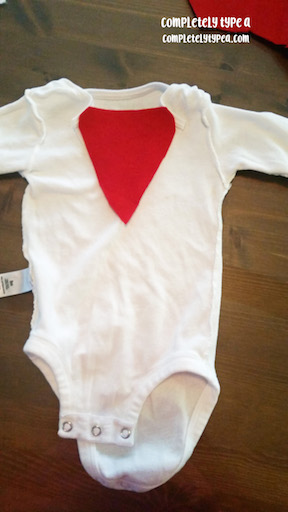
Step 2: Glue a piece of red felt over the “V” shape you’ve created.  Again, be sure your hot glue only goes through the one layer of fabric.
elvis3

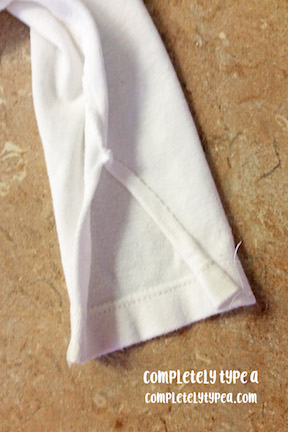
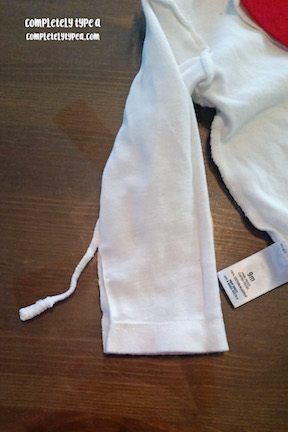
Step 3: Still turned inside out, do the same thing with each of the sleeves.
elvis4

elvis 5

elvis 5.5

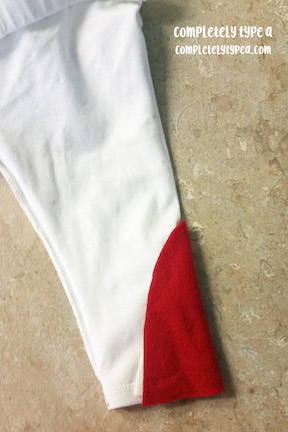
Step Four:  Turn the leggings inside out and do the same to each of the legs.  Go along the side of the leg that will face out.
elvis 6

With the onesie and leggings done, your costume should look like this once you turn it back right side out:

elvis 7

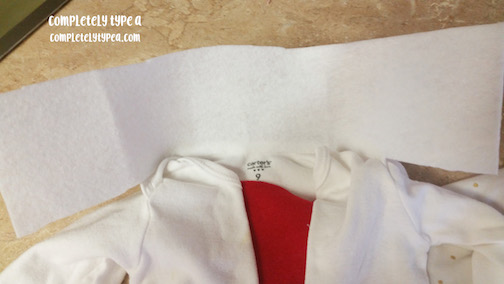
Step Five: Cut a piece of stiff white felt for the collar.  Honestly, this was the trickiest part for me.  Getting the shape of the collar was hard.  Once you’ve got a shape that works for you, glue the edge along the back of the onesie collar.
elvis 8

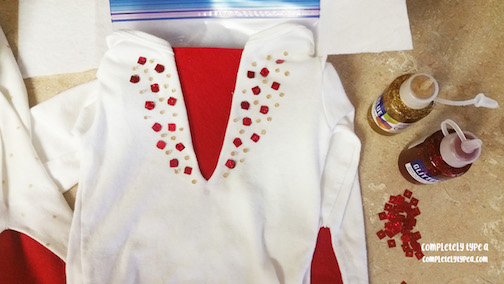
Step Six: Time to bedazzle!  Decorate the collar and sleeves with sequin and glitter glue.  I attached the sequin with glitter glue also.  Notice the zip lock bag in between the fabric so that it wouldn’t go through to the back.
elvis 9

elvis10

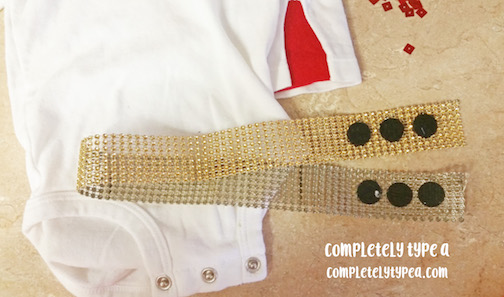
Step Seven: Glue Velcro dots onto your gold elastic for the belt.
elvis 11

All done!  Don’t forget to gel your baby’s hair in a slick Elvis curl!  Happy Halloween!

elvis 12

Quiet Activites

Standard

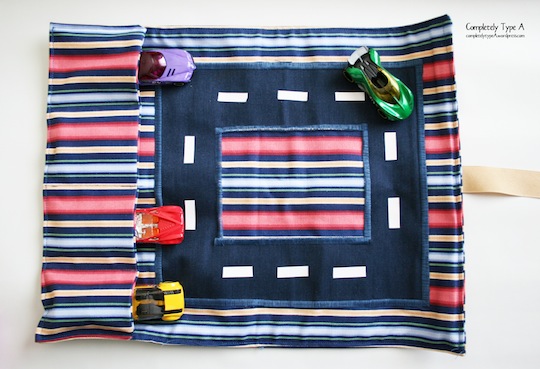
I made these little pouches for my niece and nephew so they have a quiet activity to do during church.  I didn’t follow a pattern, just went for it.  One thing the pictures don’t show is I used interfacing between the inside and outside panels.  Other than that, hopefully the pictures are self explanatory.

Girl Version:

IMG_7337

IMG_7338

IMG_7339And the boy version:

IMG_7342

IMG_7341

IMG_7340
The white road dividers are heat transfer vinyl with my Silhouette.

IMG_7344

CTR Towels

Standard

I”m lucky enough to teach the seven turning eight-year-olds at church.  Its a big year for these kids because they are getting baptized.  I’m also lucky because my friend has a FAN-CY embroidery machine.  Check out these cute baptism towels she made for ALL TEN of the kids in my class.

As each child gets baptized, I’ll give them these towels with the Baptism Towel Poem attached.

Image

IMG_6989

IMG_6990Interested in buying one of these? 

My friend sells them for $15 plus shipping. 

You can email me at

synthesizer14@yahoo.com for contact details.

Hair Bow Holder

Standard

It seems like everyone I know is having a baby girl.. which is fabulous!  I made these hair bow holders out of items I already had at home.

bows2

bows1

You’ll need:

  • A 12×12 canvas (or whatever size you want)
  • Felt (doesn’t matter what color, just used for “softness” or filling behind fabric, about 16×16 inches
  • Cute material, 16×16 inches
  • Ribbon
  • Staple gun
  • Hair bow making supplies

Basically, make a mini quilt, without finishing the edges, then staple it around the canvas.  Like this:

bows4

bows3Need more instructions?  Here’s step-by-step:

1.  Layer felt and material, sew three equally spaced lines down the center of the fabric (this will be where you place the ribbons).

2.  Line up the ribbon along the sewed lines (I taped them on with painter’s tape) and then secure them by sewing along the edge of the fabric.  You want the actual ribbon loose so that hair clips can be attached.  The ribbon is only attached at the bottom and top.

3.  Place “quilt” material face down and fold over edges.  Secure with staple gun.

4.  Make some cute bows, attach to ribbons, all done!

Felt Card Table Play House

Standard
Felt Card Table Play House

Welcome to my craft blog!  Its about time.  First up, my felt house.

So I get these ideas… I bite off more than I can chew… My eyes are bigger than my stomach. .. You get the idea.  I saw these felt houses on pinterest and decided that I was going to make one for my kids for Christmas. The problems with this idea are as follows:

1) I don’t sew well. At all.
2) I didn’t want to fork over the $25 to buy one of the patterns I saw online.
3) December is the busiest month of the year for me.
So here it was, the Monday before Christmas and I had a TON of felt (because I changed my mind 3 times, I literally had enough felt to make three of these things) and I hadn’t even started.  So, I got a good pair of fabric scissors and went to town. No pattern, just started making stuff up. Five nights up to 2:00 am later, I realize I am 1) CRAZY and 2) AWESOME.  I didn’t get much sympathy from the hubs, he pulled the you-bring-it-upon-yourself argument, which, of course, I repeatedly choose to ignore.
I am proud, so there are many pictures. No need to view them all unless you also feel like being crazy and making one of these. I give tips on how to do this at the end.  And most importantly, my kids love it, have slept in it, play in it everyday, and hide in it to eat treats they aren’t supposed to.


The only “during the process” picture, sorry!
Doggie door:

(Trivia question: who are our dogs named after?)

Apple, corn, carrot, tomato
Letters for the mail box:

Questions I would ask me if I were you:

1) What kind of table did you use?
I used two card tables side by side. I didn’t want it set up in my kitchen on my kitchen table and I thought one card table was too small.
2) Any useful hints?
-Make each panel separately, then attach them to the roof. I just used a zigzag stitch along the top.
-Don’t use any other material except felt- no seams!
3) What would you do differently?
-On the apples and tomatoes- velcro at the top of the fruit instead of the middle.
-Cut less away underneath on the door and dog door so that the green and brown lay over the blue better (I did about 1 inch, would have done 3 inches)
4) How long did it take?
Give or take about 20 hours, if you have sewing skills, I’m sure it would go much faster.
5) How much did this cost?
Not sure, since I way over bought on felt. Probably about $30 without all the extra.
I got my ideas from: