Valentine FHE: Plan of Salvation with FREE PRINTABLE

Standard

I found this great little drawing on Pinterest and decided to make a printable graphic I could give out during our Valentine Family Home Evening.  For my lesson I went through the whole plan, step by step, then had the kids look for the “hidden word”.  Once they found “LOVE”, we talked about WHY Heavenly Father gave us the Plan and how much he really does love us.

Help yourself to a 4×6 or 8.5×11 of my design for your own personal use.  Thanks to the original genius behind this cute idea.

4×6:

plan-of-salvation-love-4x6

And here’s the 11×8.5:

plan-of-salvation-love-11x8


Terms of use:
© Completely Type A.  For personal use only.  Unauthorized use and/or duplication of this material without express and written permission from this blog’s author and/or owner is strictly prohibited. Excerpts and links may be used, provided that full and clear credit is given to Completely Type A with appropriate and specific direction to the original content.

Infant Elvis Costume NO SEW!

Standard

elvis 12

That’s right, you read correctly, this is a NO SEW Elvis costume.  I used my hot glue gun to put it together.  It was a late night, last minute, one hour project, using my cell phone to take pictures… So you get what you get.

Now, if you’re looking for a durable costume to last you for years to come, for heaven sake, pull out the sewing machine and sew wherever I say glue.  BUT, if you know your kid is only going to wear this once or twice, and you don’t care if it lasts that long, follow my lead, my friends.

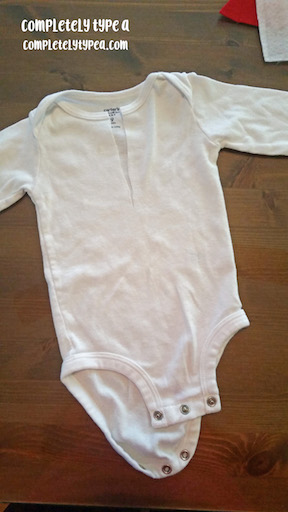
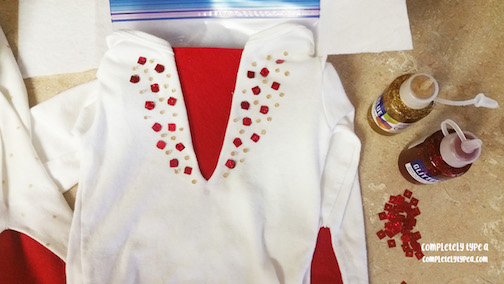
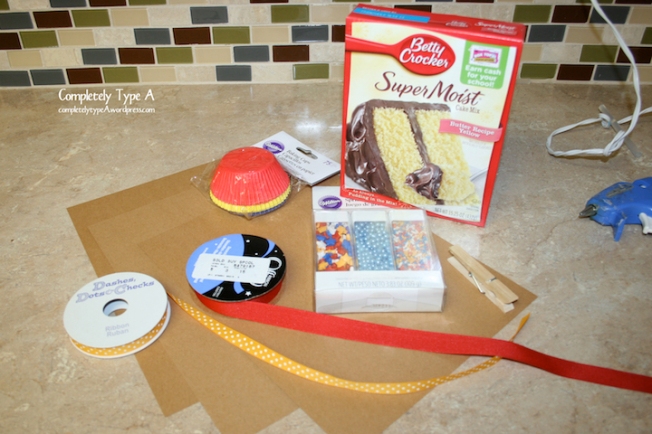
I started out with a long-sleeve onesie and a pair of white leggings from Target.  I went looking for plain white, but the only ones I could find had little gold dots on them.  Luckily, this worked with the costume.  You’ll also need red felt, stiff white felt, red and gold glitter glue, gold elastic, Velcro dots, sequin, and most important, a glue gun.

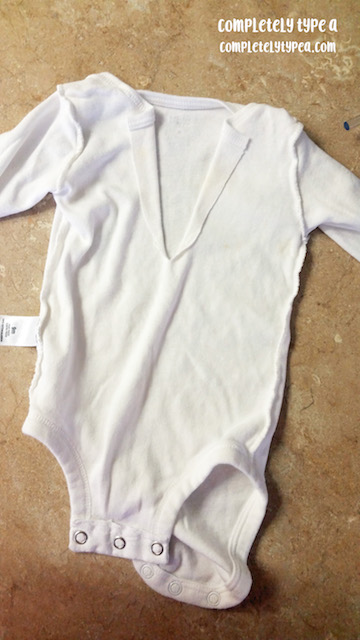
Step 1: Cut a slit in the front of the onesie starting at the middle of the collar.  Turn the onesie inside out and fold the side back and glue down with hot glue.  Be careful that your glue doesn’t go through both layers.  Place cardboard in between to be safe.

elvis 1

elvis 2

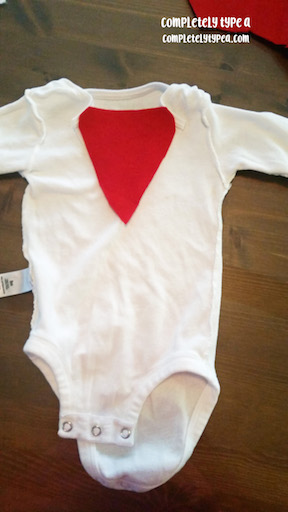
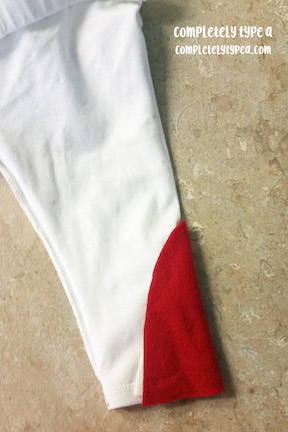
Step 2: Glue a piece of red felt over the “V” shape you’ve created.  Again, be sure your hot glue only goes through the one layer of fabric.

elvis3

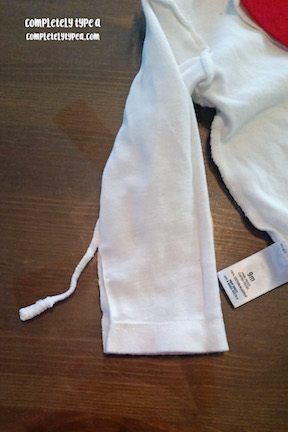
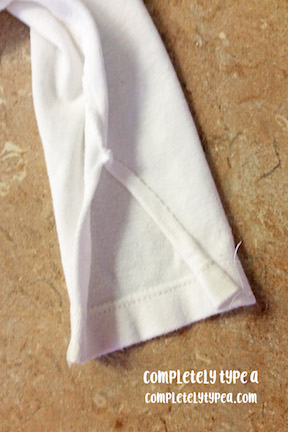
Step 3: Still turned inside out, do the same thing with each of the sleeves.

elvis4

elvis 5

elvis 5.5

Step Four:  Turn the leggings inside out and do the same to each of the legs.  Go along the side of the leg that will face out.

elvis 6

With the onesie and leggings done, your costume should look like this once you turn it back right side out:

elvis 7

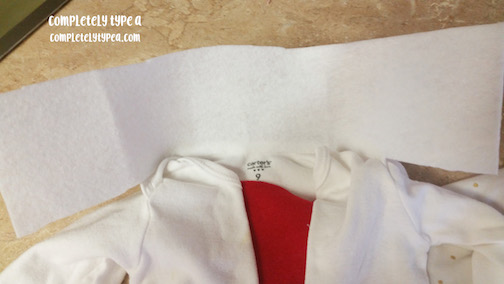
Step Five: Cut a piece of stiff white felt for the collar.  Honestly, this was the trickiest part for me.  Getting the shape of the collar was hard.  Once you’ve got a shape that works for you, glue the edge along the back of the onesie collar.

elvis 8

Step Six: Time to bedazzle!  Decorate the collar and sleeves with sequin and glitter glue.  I attached the sequin with glitter glue also.  Notice the zip lock bag in between the fabric so that it wouldn’t go through to the back.

elvis 9

elvis10

Step Seven: Glue Velcro dots onto your gold elastic for the belt.

elvis 11

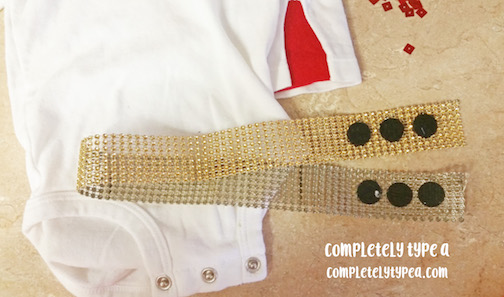
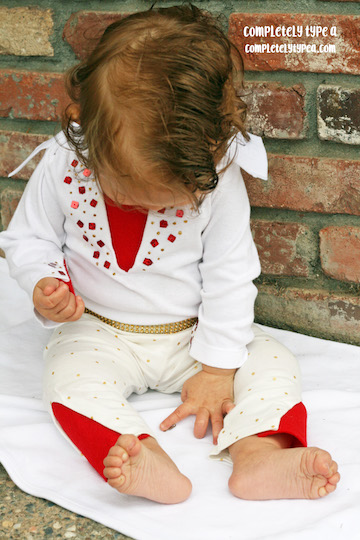
All done!  Don’t forget to gel your baby’s hair in a slick Elvis curl!  Happy Halloween!

elvis 12

Book Shelf Makeover with Paintable Wainscoting Wall Paper

Standard
Book Shelf Makeover with Paintable Wainscoting Wall Paper


Looking at my book shelves one day, I realized they needed a makeover.  They were cheap to begin with and I didn’t want to spend a lot of money to update them.

bookshelf 1

I was wandering around Lowes pricing out various ideas and came across WAINSCOTING PAINTABLE WALL PAPER.  Never heard of the stuff, but it looked dang cool, so I thought I’d give it a try.

bookshelf 2

I first spray painted everything that I was going to paint white:

book shelf 3

Then I painted with semi-gloss paint the shelves and box.  It took THREE coats and I used Swiss Coffee from Home Depot color, the same as my house trim.

book shelf 4

I then laid the shelves down flat and applied the wall paper following the directions.  That middle shelf is permanent, otherwise I would have pulled that out too.  It took four separate pieces of wall paper for each shelf.  I wasn’t worried about getting it absolutely perfect because it would mostly be covered by books anyway.

book shelf 5

I then taped off with painters tape and painted the wall paper a Sherwin-Williams color called Mega Giege, which is the same color as my walls.  It took two coats with a small foam roller.  Again, I wasn’t too worried about perfection.  Here’s a close up with a few of my favorite books:

bookshelf 7

I wish I could arrange my books to look prettier, but we’re going for functional here.  But, you get the idea.  It completely brightens up the room and matches my other furniture and decor much more!

book shelf 6

A side-by-side view:

book shelves front


Cub Scout Blue and Gold Dinner Decorations

Standard

I had the task of decorating for our Cub Scout Blue and Gold dinner.  We didn’t have a specific theme, just blue and gold, which made it pretty easy!  I went to Party City and got the disposable plastic table coverings (100 foot roll) and all the paper products.

I used these amazing games as the place mats and had pencils out on the tables also.  Thank you Akela’s Council Blog for your hard work!

For centerpieces, I used these wooden stands from a previous project and added vinyl with my Silhouette.  I used the 12 Core Values of Cub Scouts and labeled each centerpiece with a different value.  I printed off the Cub Scout logo and taped them on the centerpieces with painters tape.

IMG_8920IMG_8919IMG_8914The gold stars on sticks doubled as decorations and trophies for the awards for the cake decorating (all the boys got one).  I got the pre-cut stars and a pack of dowels at Joann’s, and had the Hubs cut a 1×1 stick of wood into squares.  In one of our den meetings, the boys painted everything yellow and I added the blue vinyl and ribbon.  The best part about these is they were about 35 cents each to make.  Not bad!

IMG_8921We organized the eating tables in a “U” shape.  At the top of the “U” we positioned the flag stands, the food tables, and the cake tables.  It looked fabulous and everyone had a clear view of the front.  Sorry, this is the best picture I have of the table set up.

IMG_8917It all worked out great, a pretty fun night!

Cake Mix Gift Tutorial

Standard

Trust me, there are a million cute cake mix gift ideas out there.  Comparatively, I think my version is plain, next time i make this, I will jazz it up a little!  I got caught in the trap of trying to match the box of cake mix- red, which is unnecessary since the cake mix doesn’t even show that much.  When I do this again, I’ll do whatever colors I want!  I got the sprinkles and cupcake holders at Joann’s with my coupon, the total cost for everything was about $5 including the cake mix since I had the ribbon and paper on hand.

IMG_2358

Here’s the back:

11And here’s the tutorial, good luck!

Here’s all the items you need: three pieces of 8.5×11 card stock, another half piece of another color (not pictured), two colors of ribbon, a cake mix, a three pack of sprinkles, clothes pin, cupcake holders, clear bag sandwich bag (not pictured) and glue gun.  I don’t have measurements, just based everything off the size of the box and sprinkle containers.

1
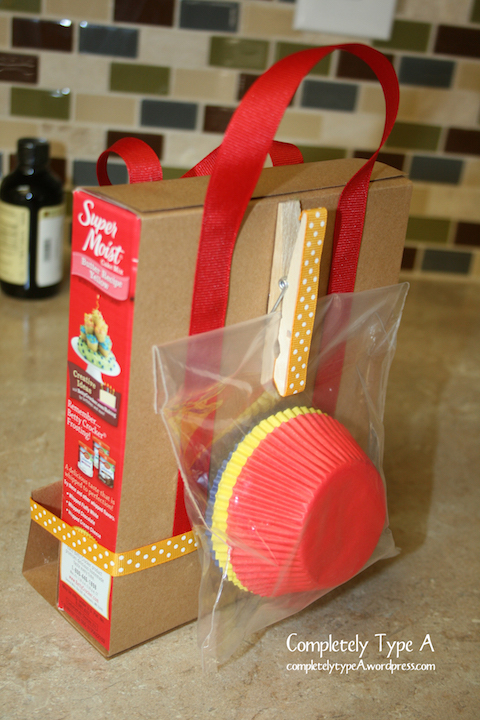
Take two of the card stock pieces, cut to width of cake box and glue to each to the bottom and top:2Fold red strips to fit around the sprinkles:3Attach your last piece of card stock to the bottom of the cake mix and make a fold the same size as the sprinkle container:4
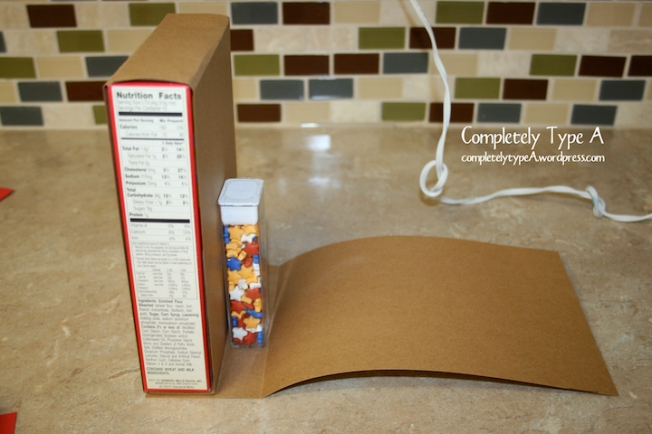
Glue on paper for sprinkles, insert sprinkles into their holders:5
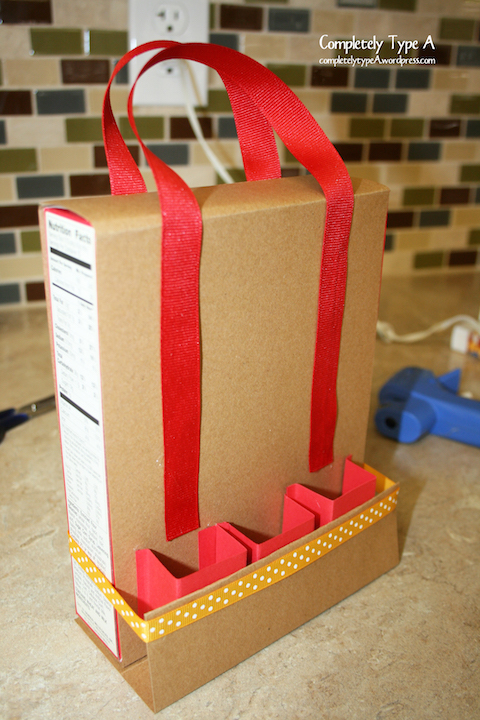
Trim and fold card stock as pictured:
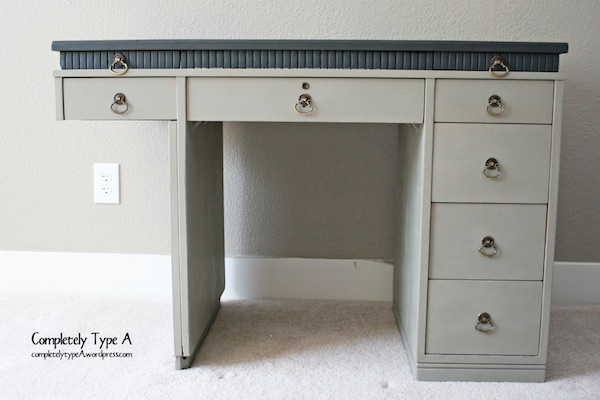
6Glue to sprinkle paper and flap down (the flap is just for added strength):7Attach the ribbon.  Here’s the front…8 And here’s the back.9Glue on the clothes pin and add the cupcake liners to the back:11Decorate the front, all finished!IMG_2358

Simple Nativity

Standard

easy nativityHere’s a super simple nativity gift idea.  I made four of them in a few hours (mostly drying time for the paint) and have a few more gifts checked off my list.  If you want the step by step, here it is:

1) Cut 1×4 wood into 5.5 inch pieces (or whatever size you want).

2) White wash the wood with two part white paint and one part water.  Paint all sides and front and back.

3) While drying, cut vinyl.  This is a Silhouette shape sold on their website.

4) Apply vinyl to wood when paint is dry.

So easy and less than a dollar each!

Soccer Gifts

Standard

With soccer season coming to an end, its time to acknowledge the efforts of our players and say thank you to our coaches… BUT I think trophies and plaques are super lame.  They sit on a shelf and are usually made of super cheap plastic.  I like useful gifts!  For my daughter’s team, we decided to do water bottles for the girls.  All the returning players will have them for next year.  SInce we are the Bumble Bees, I got yellow stainless steel bottles and used black outdoor vinyl.  The stainless steel water bottles I got at Discount Mugs.  Out the door with shipping and tax, the bottles were $5.50 each (be sure to google for coupons).

 IMG_8337 IMG_8338Check out the backs:

IMG_8339

For my son’s team, I made these dry erase clipboards for the coaches.  I got the clipboards off Amazon and then personalized with indoor vinyl.  Its not pictured, but the other side of the clipboard also has a full soccer field printed on it and dry erase marker.

IMG_8335Done!

My Fence Fell Down, So I Made Stuff

Standard

The morning after a wind storm we awoke to our fence laying flat on the ground.  Not the best news, but at least I had a whole bunch of distressed wood to make a few things.  I wish I had patterns to tell you for these, but really I just got out the skill saw and drill and went to town with no real plan.  Here’s what I did:

US flag: Wood split in half longways to make smaller pieces.  I used barn red, navy, and off-white paint and made the vinyl wording and star stencil with my Silhouette.

flagGarden Table: I made this garden table as a gift for my cousin.  I love how it matches her door!  I did have to get some 2x4s for the base, only the top is wood from my fence.

table“Be the Good”: This sign hangs in my kitchen.  I love the message!  Again, I made a stencil with vinyl, then painted it colors to match my decor.

be the goodFront Entry Sign: This hangs on my front porch.  I love how it compliments the color of my house.  I use the little knob to hang seasonal signs.

front signFrame: I tried something new with this, still deciding if I like it.  I had a green distressed frame, so I made a pallet background for it to help it to stand out and make it look bigger.  I covered it in Mod Podge (after washing with water) to give it a shiny look.  I like how all the grain shows through, but not sure if I like the overall look.  This is just a stock photo added in.

frame

Annie Sloan Chalk Paint Projects

Standard

I’ve been working on refinishing a few pieces I received from my 95 year old aunt. I used Annnie Sloan chalk paint with the clear wax on both projects.  There’s a million great posts on how to apply Annie Sloan paint, so I won’t repeat it here, but hopefully you can get some ideas!

This cedar chest was in pretty bad shape. Here’s the “before” picture:

chest 1    I used Paris Grey to updated it a little. Like my stairs? I refinished those too.chest 2

I also got this great little desk that my kids use for homework.  While I was working on it, I found a drawer signed by my great Uncle dated 1978 as the last time it was refinished.  Here’s the before:

desk 1

And here’s the after.  I used Fresh Linen for the main part of the desk and Graphite for the top.

desk 3desk 2

My New Master Bathroom

Standard

Our master bath got a serious facelift.  Having a twenty-five year old house means there’s 4×4 white tile with big grout (now grey instead of white) EVERYWHERE.  Now, before you look at the “before” picture, know that this is one of those widened Photoshopped pictures that a realtor took- it didn’t look this awesome or this big before.  Notice the white tile all the way to the ceiling, the odd ceiling soffit, yellow oak cabinets, and the crusty gold shower. You can’t tell from this picture, but the tub in corner takes up a huge portion of the bathroom since its sitting at a diagonal.

Master_BathHere’s the after, I don’t have a wide lens to get the whole bathroom at one time.

The walk-in shower with cascading glass panel, SO EASY to clean:

showerThe vanity: vanity 1vanity 2
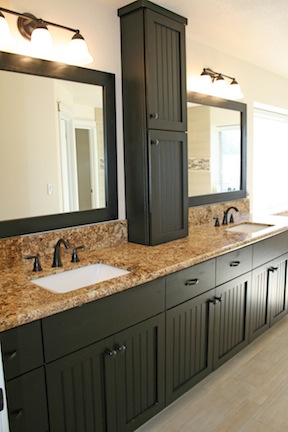
Where the tub used to be, but for now empty.  We might add a free standing tub later, but for now I’m loving the empty space.  I’ll probably just put a small shelf with towels in the corner.  I love the 12×24 tile on the walls.  The whole bathroom is grouted with mold free grout.  Sweet.cornerA few close-ups, here’s one of sinks:4
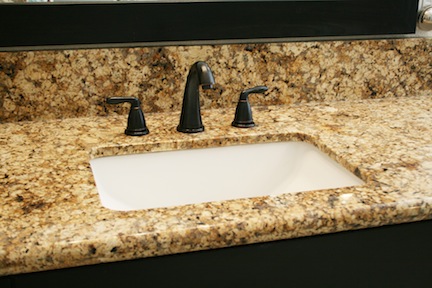
Here’s the tile floor, it looks like white washed wood, and I LOVE IT.3 The cool shower drain, no circle drain in the middle of the shower.2 
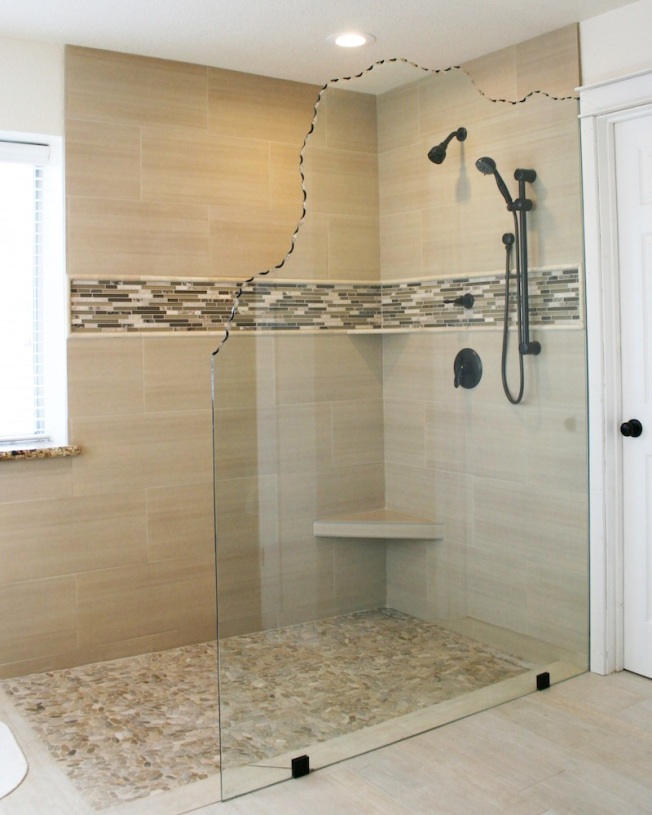
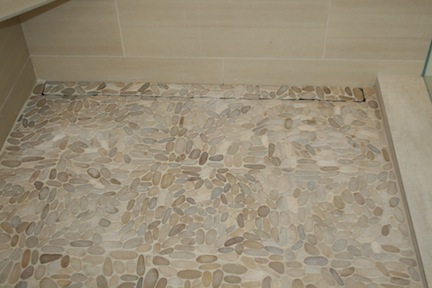
Some of the tile detail in the shower.1This new bathroom is a million times easier to clean and is now the nicest room in house.  We might just have to have Thanksgiving dinner in here…