DIY Soccer Banner and a *GIVEAWAY*

Standard

It’s soccer season around here, and let me tell you, people go ALL OUT.  I love being a soccer mom, but not a big fan of all the costs involved.  In our league, each team is required to pitch in to purchase a team banner which usually runs about $300.  Too expensive!  This year, I offered to make our Bumble Bee banner and Expressions Vinyl was kind enough to donate the supplies.   I also have an awesome giveaway from Expressions Vinyl, more on that at the bottom of the post.

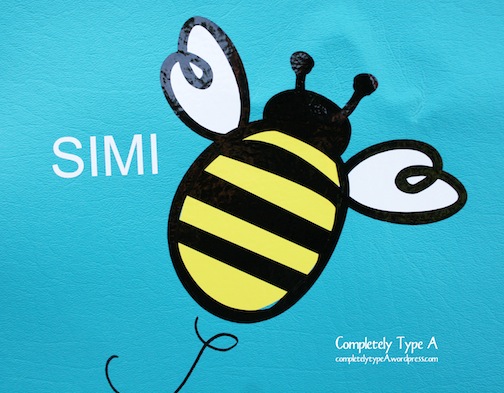
We are the Bumble Bees, a very fun theme.  The blue background piece is heavy vinyl like the type you’d use for table cloths, purchased at a fabric store.  The frame is made from PVC pipe and breaks down easily to carry.  Everything rolls up together and is easy to transport.

The design is all outdoor vinyl and the shapes are all purchased from the Silhouette Online Store.

banner 2 Here’s a better view of the stand:

banner 6I loved how the soccer ball beehive and the bees turned out:
banner 3

banner 4If you’ve never done multiple layers of vinyl, its simple!  Just build the shape front to back, on transfer tape first:

banner 1 GO BUMBLE BEES!

*GIVEAWAY INFO*

I have a $25 gift card that can go towards any vinyl purchase from Expressions Vinyl to give away to one lucky winner!  I purchase all my vinyl from this company because their prices are low, they send out great coupons via email, and shipping over $75 is free. 

HERE’S HOW TO ENTER:

Go to Expressions Vinyl and find your favorite product.  List it in the comments section of this post.  One winner will randomly be chosen on Sept. 8, 2014. 

THIS GIVEAWAY IS NOW CLOSED.  CONGRATS TO OUR WINNER!

How to Make Elsa’s Ice Castle from DISNEY’S FROZEN

Standard

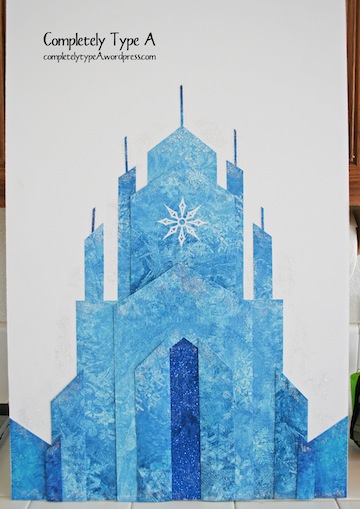
I’ve been searching the internet the last few weeks for ideas for my little girl’s Frozen birthday celebration.  I wanted to use Elsa’s castle for the centerpiece at the party, but not finding anything in my price range (I will not spend $110 on this!) I decided to make my own.  I’m giving a shout out to this guy’s tutorial since I based my castle shapes off his Frozen castle.  I had most of the supplies on hand, so this whole project only cost me $2.50 for the foam core.

castle finished

Supplies Needed:

  • 3   12×12 pieces of card stock (I recommend something with a glossy finish or photo paper)
  • 1 piece of foam core
  • glue or paper Mod Podge (something that won’t warp your paper)
  • paint brush (to apply the glue)
  • glitter and embellishments
  • 3D mounting tape
  • scissors and/or cutter

Here we go!

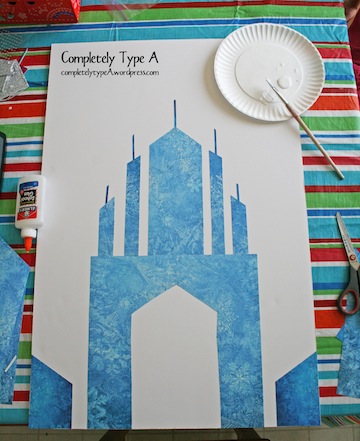
I first made a pattern out of plain white 12×12 paper so that the measurements would show up better for you to see.  You don’t need to make a pattern, just cut your paper to the measurements I’ve specified.  All measurements are in inches.  The red circled letters are explained later.

Here’s how each 12×12 piece of card stock is cut.  Please note on the second page how there’s a section from the third page taped on.

castle page 1

castle page 2castle page 3

Once you’ve cut out your pieces, you can begin to assemble your castle.  The circled red letter on each piece indicate which layer the piece will be at.  For example, all the “A” pieces will attach directly to your foam core first.   The spires are just made from scraps.

castle level a

castle part A

Next add Level B.  Use mounting tape for all attachments.

castle level B

castle part B

I then added glitter to the middle of the door opening.  I think if I made this again, I’d use silver glitter, but your choice!

Attach the Level C piece:

castle level c

castle part CAnd lastly, the Level D pieces:

castle level D

castle part D

I then added a few embellishments including sliver glitter around the edges and a white snowflake made with my Silhouette.

castle embellishments

Then cut around the outside of the castle with a sharp exact-o knife, leaving about a 1/4 inch around the edges.  I took the left over foam core and attached a piece to the back of the castle so that it would stand.

All done!  I’ll post about the rest of the birthday party soon.

castle finished

Terms of use:
© Completely Type A.  For personal use only.  Unauthorized use and/or duplication of this material without express and written permission from this blog’s author and/or owner is strictly prohibited. Excerpts and links may be used, provided that full and clear credit is given to Completely Type A with appropriate and specific direction to the original content.

Quiet Activites

Standard

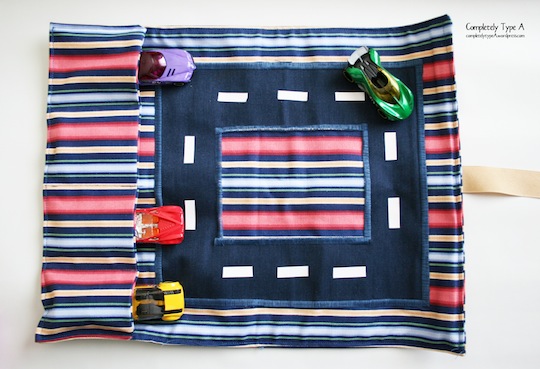
I made these little pouches for my niece and nephew so they have a quiet activity to do during church.  I didn’t follow a pattern, just went for it.  One thing the pictures don’t show is I used interfacing between the inside and outside panels.  Other than that, hopefully the pictures are self explanatory.

Girl Version:

IMG_7337

IMG_7338

IMG_7339And the boy version:

IMG_7342

IMG_7341

IMG_7340
The white road dividers are heat transfer vinyl with my Silhouette.

IMG_7344

Flower Pot Candy Bowl: Easter Version

Standard

I’ve been eying those darling DIY gumball machines for awhile now.  Needing a little gift, I made a spring version.

easter candyMy first choice would have been to paint the pot a pastel color to match the knob, but bright pink was what I have on hand.  I got the glass bowl at Walmart and the knob at Lowes, each for a dollar.  The “Happy Easter” was made with my Silhouette vinyl cutter.  The candy was the most expensive part!

Sunshine Art Gift

Standard

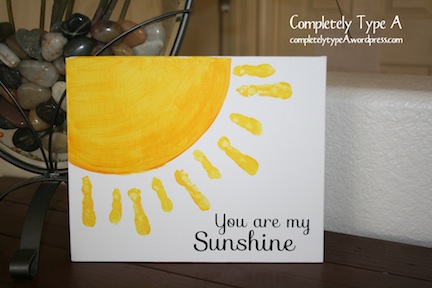
In search of a homemade gift from my kiddos, I saw a few variations on Pinterest of this idea, mostly using footprints.  They were super cute, but I didn’t want to invest in a large canvas big enough for feet.  Instead I used an 8×10 canvas panel that I purchased on Amazon in a 12 pack (around a dollar a piece).  I outlined the circle for my oldest kiddo and he painted the sun.  Then I helped each munchkin make three or four fingerprints on the canvas.  Using my trusty Silhouette I cut out the letters in vinyl and applied to the canvas.  I love how it turned out!  On the back (not pictured) I put “Made with Love and Little Fingers” and had all my kids sign their names.

IMG_7052edit

Strawberry Baby Girl Shower

Standard

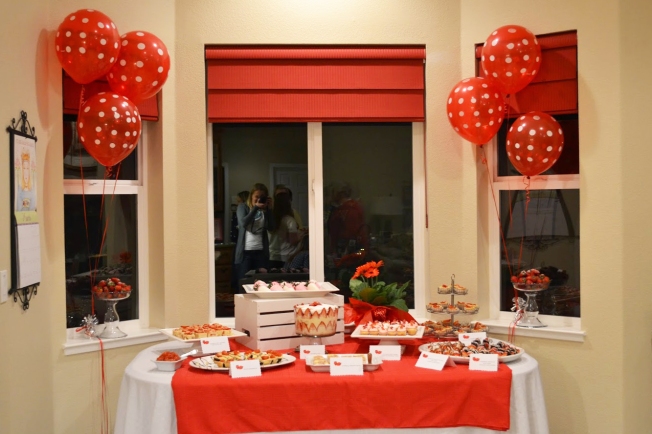
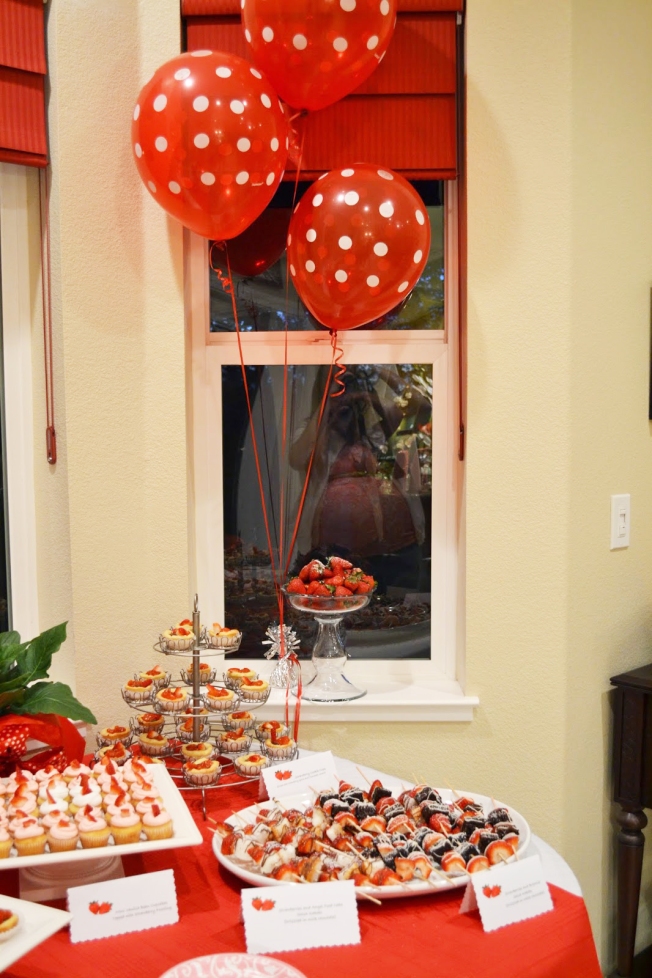
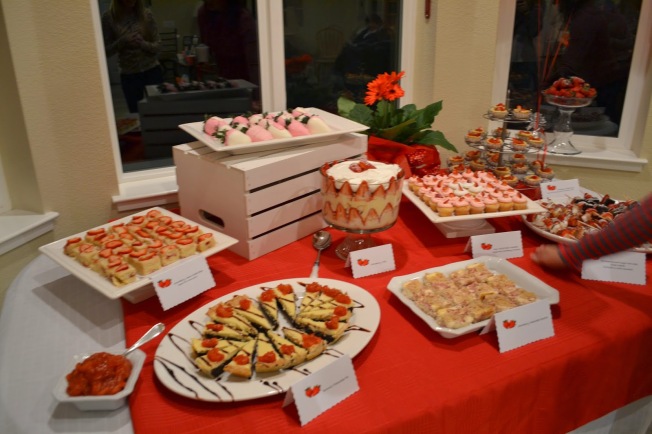
My friends and I threw a strawberry themed baby shower for Brittney, pregnant with #4 and her first girl.  It was a large shower, so we did open house style in the evening after dinner, so only serving desserts.  We did everything in red, pink and green.  Check out the cuteness:

DSC_0061

Strawberry lemon-aid and pink and white candies

DSC_0055

“Advice for Parenting a Girl” sign in book

DSC_0053

DSC_0034Strawberry desserts GALORE!

DSC_0047

DSC_0040

DSC_0038

DSC_0039

DSC_0036

DSC_0037

DSC_0030

DSC_0045

DSC_0044Its hard to tell by the picture, the favors were gumballs in long pretzel bags with a note attached.

DSC_0046Our game:  The Price is Right, guessing the prices of the baby items.  The prizes were strawberry hullers.


Reusable Table Centerpieces

Standard

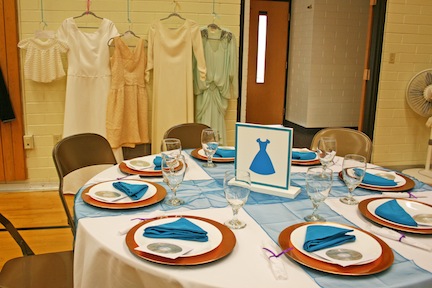
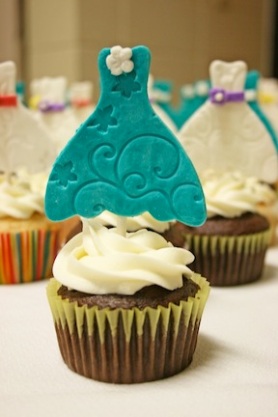
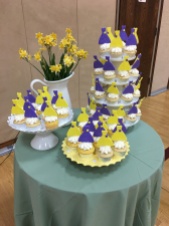
I was asked to make some table centerpieces for our Relief Society 100 Dresses activity.  I decided to make something I could reuse, so I came up with these plain white wood panels.  The base pieces are 1x4s cut 12 inches long.  The upright piece a 1×8 cut to 8×10 pieces.  They are screwed together on the bottom and painted white.  I used my Silhouette to decorate both sides with vinyl to match the theme.  My plan is to reuse these for future activities and holiday decorating by just removing the vinyl and replacing it with whatever vinyl designs I want.

I can only take credit for the centerpieces, but the ladies on the RS committee did a beautiful job decorating with vintage and special occasion dresses hung around the room and beautiful table settings.  And check out those cupcakes!  Amazing!

Image

center 2

center 3

Image

Update:  I did this event again, in anther ward.  Here’s a few of the pictures.  The favors are wedding favors from Amazon and I just cut out a dress and glued it over the wedding dress.  Lifesavers are inside.

CTR Towels

Standard

I”m lucky enough to teach the seven turning eight-year-olds at church.  Its a big year for these kids because they are getting baptized.  I’m also lucky because my friend has a FAN-CY embroidery machine.  Check out these cute baptism towels she made for ALL TEN of the kids in my class.

As each child gets baptized, I’ll give them these towels with the Baptism Towel Poem attached.

Image

IMG_6989

IMG_6990Interested in buying one of these? 

My friend sells them for $15 plus shipping. 

You can email me at

synthesizer14@yahoo.com for contact details.

Easy Disney T-shirt

Standard

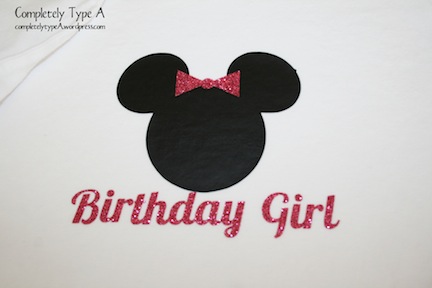
We took a special trip to Disneyland to celebrate a special birthday girl turning six.  She needed a cute shirt to wear on her big day!

shirt 1

shirt 2I used heat transfer vinyl in black and glitter pink, cut on my Silhouette Craft Cutter.  I designed the shapes myself in Silhouette Studio with the shape drawing tool and the welding tool.

Want to see other Disney shirts I made?  Here’s our Halloween costumes from last year, just a phone picture, sorry:

incredible shirtsThese were made the same way, just a little trickier, since each color has to be done separately.  At three dollars a shirt, this was a way cheaper option than purchasing them from the Disney Store.


Paper CTR boxes

Standard

“CTR” stands for “Choose the Right”.  At church, I teach seven year old boys and girls.  They get a ring that has the CTR symbol on them, reminding them to Choose the Right.  I made these little boxes to put the rings inside.

I got the template of this A-MAZING site that designs templates for any size box you want.  I just put in my dimensions and printed out how many I needed.  I made the white CTR logo on my Silhouette Craft Cutter.

ctr 1

ctr 2This would also be a great, inexpensive way to package a gift for baptism.